Month: June 2023

Microsoft Teams Preview

Microsoft Teams Preview is being rolled out for Education tenants.

You can now opt in to get Teams previews by completing the registration form at https://forms.office.com/e/yFmnU9fuMA

This will add you to the group which has the preview policy applied. Once available on our tenant you will be able to switch to Preview mode using the toggle switch on the main title bar in the Teams client for Windows.

Please note that this applies to both Windows and Mac OS clients (as of 01/09/2023).

You can find out more about the Teams Preview by visiting the Microsoft Adoption Pages at this link … New Microsoft Teams (Preview) – Microsoft Adoption
Present Local PowerPoint files as PowerPoint Live in Teams

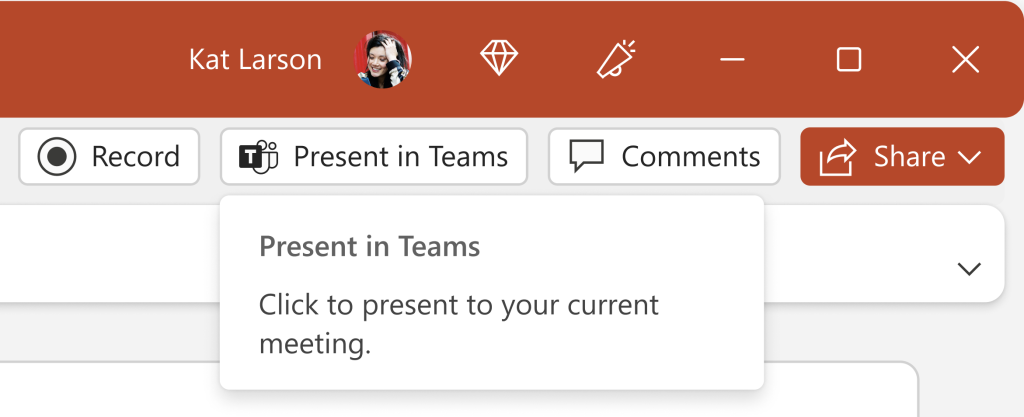
The “Present in Teams” button in the PowerPoint app is being extended to PowerPoint files that are not stored in Microsoft 365 Clouds.

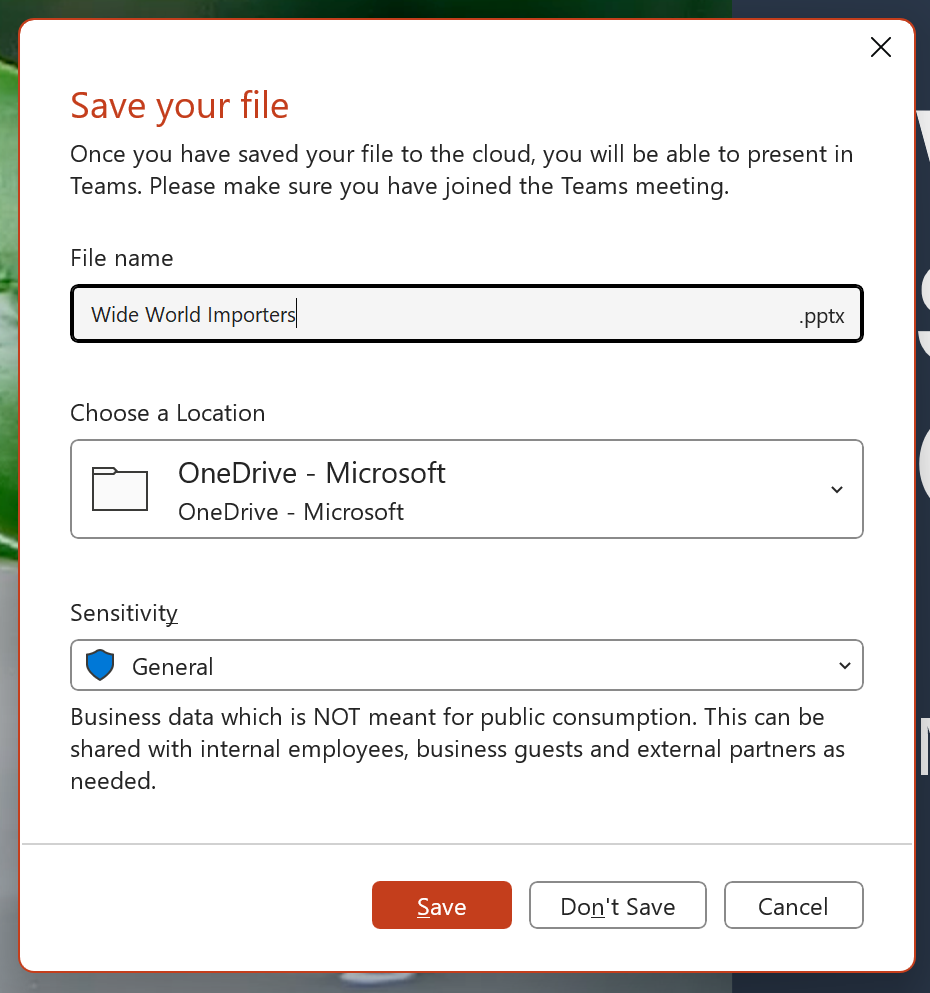
You will be able to use the “Present in Teams” button in the PowerPoint for Window app to present via PowerPoint Live in your Teams meetings, even if your file is not stored in Microsoft 365 Clouds. This is a new PowerPoint Live entry point for those files, in addition to the “Browse my computer” button in Teams Share tray. Clicking the “Present in Teams” button first leads you to the Save As dialog to store the file to the Microsoft 365 Cloud. Once the file is saved, we’ll automatically trigger PowerPoint Live to present your file in your current Teams meeting.


Image of the "Present in Teams" button in PowerPoint
Image of the “Present in Teams” button in PowerPoint


Screenshot showing the save to cloud function invoked when using Present to Teams on a local file.
Image showing the save to cloud function


For whom?

This update is only available currently to the PowerPoint app for Windows and is not available in the Mac app yet.

When?

Release is planned for the end of July 2023.


ICT Service Desk Changes – 26 June 2023

Changes to how you contact the ICT Service Desk

ICT are introducing changes to ASK (ServiceNow) to improve how our staff, students, and external customers interact with the ICT Service Desk.

From Monday 26 June, the following changes will be implemented:

  1. Emailing service.desk(at)imperial.ac.uk will no longer automatically create new tickets in ASK.
  2. Improvements to ASK, our online service portal including a new general ICT enquiries form used to access general IT support.
  3. New service status on ASK, displaying ICT services that are unavailable.
  4. New customer facing ASK portal for prospective students and suppliers to submit IT enquires.


Why are ICT making these changes?

This work will reduce the reliance on email, providing an efficient, more seamless user experience, with tickets going directly to the right team. It also sets the foundations towards ICT’s vision of a simple, user-friendly portal where staff and students can benefit from knowledge articles, live service status updates and quicker resolution time using automated forms.

ICT’s vision is to continue to improve ASK so that it is a useful resource for all staff and students to find solutions and seek ICT support. You can follow our progress by reading our Cross Functional Product release notes.

Visit ICT’s changes to how you contact ICT Service Desk web page for the latest information including how this change impacts you, the benefits, how you can help and an FAQ section which will be updated in line with feedback from our user testing group.

Yammer rebranding to Viva Engage

Yammer will be rebranded to Viva Engage. Microsoft are beginning the web rebranding exercise in late June and expect it to be complete by mid-July.

Rebranding has already completed for the mobile apps – so if you had the Yammer app on your phone or tablet then it will already have been updated and rebranded to Viva Engage.

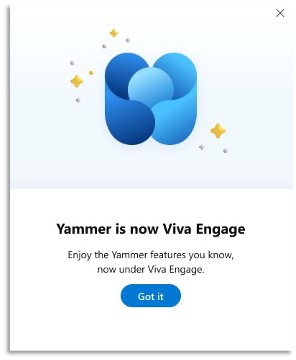
When you sign in to Yammer following the completion of the rebranding exercise you will see a notification like this …


Image of the Yammer to Viva Engage rebranding message
Yammer to Viva Engage message that will be seen on completion of the rebranding.


There is no work required by users for this to happen – it will automatically update.  All the existing Yammer features will continue to work in Viva Engage.


Integrations with other ares of Microsoft 365.

If you are looking to utilise Yammer in Teams then you may need to look for Viva Engage instead.

The Power Automate integration to Yammer will soon be updated to reflect the rebranding to Viva Engage,

Effective Hybrid Meetings on Teams

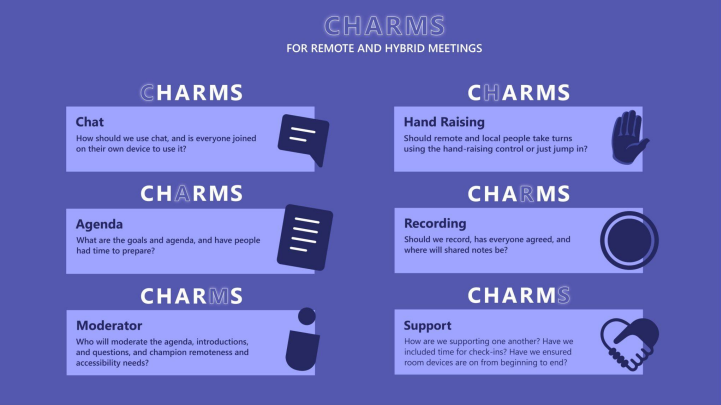
While reviewing a Yammer (soon to be Viva Engage) community that I am involved in, I came across the following actions that you can take when hosting or participating in meetings to make them effective Hybrid meetings that work like “charms” …


CHARMS for Remote and Hybrid Meetings
The six CHARMS to making Teams meetings effective


When you join a Teams meeting whether you are joining in person or remotely, use a personal device to join the meeting (ensuring that you are muted if in a meeting room).  This will allow you to then …


  1. Join in small talk

    You can use the chat function on your personal device (laptop, tablet or phone) to directly engage with others in the meeting using the chat function.

  2. Participate via chat or by using the hand raise feature

    Ask questions or post suitable information using the chat, or “raise your hand” and when called upon, provide a verbal update.

  3. Pin a participant

    Not so that you can throw darts at them!  Rather to keep the participant in focus – especially useful in a large meeting.

  4. Recognize who is talking

    Transcription will detect who is speaking – so if you use your device it will correctly attribute your comments in the transcription and live captions to you.

  5. Turn on Live captions

    Live captions provide a brilliant way to keep up with who is saying what in a meeting, and for those with accessibility issues they provide a vital additional means of knowing what is going on.

  6. React using emojis

    Emojis add fun and also provide a great way to show recognition, appreciation and engagement.

Work Hours and Location

Setting your Work Hours and Locations for “Hybrid Working”

Did you know that you can now set your work hours and location (Office vs Remote) in Outlook on the web?

This can be really helpful for your colleagues who when organising meetings will be able to see whether you are working remotely or in the office and plan accordingly.


To set your hours and location head to Outlook in a web browser (Google Chrome or Microsoft Edge give the best experience). Once in Outlook on the web click on the cog wheel near your profile photo or initials and choose “View all Outlook Settings”.


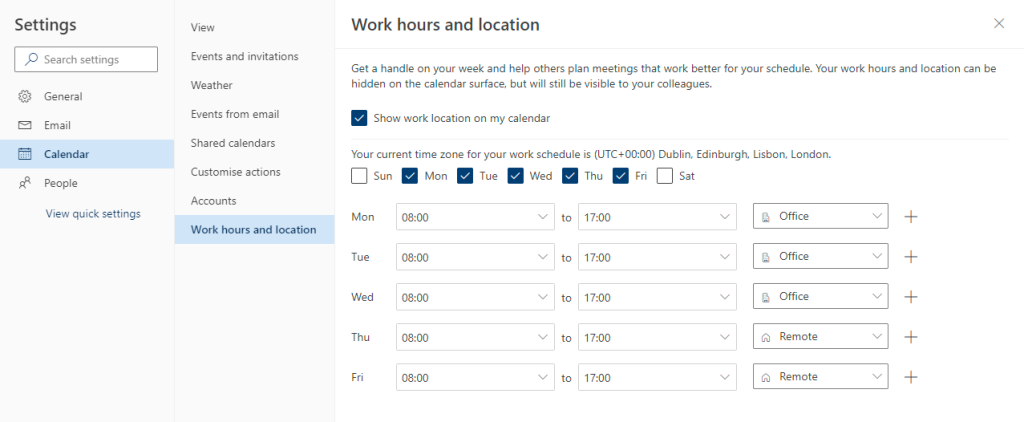
In the resulting settings box choose Calendar and at the bottom of the Calendar options you will find Work Hours and Locations. Click on this and then you can set your work hours and locations. You can even set up “split days” with part remote and part office based locations.


Screenshot showing setting of work hours and locations in Outlook Web Access
How to set your work hours and locations


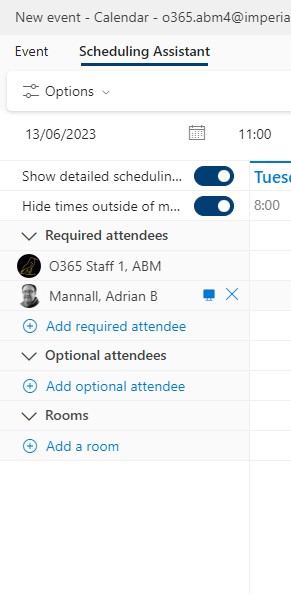
Once you have set your options and clicked Save, your location will appear beside your name in the Scheduling Assistant in Outlook on the Web. There are plans to roll this out to Outlook Desktop and Mobile clients in the future, but for now it just shows up in Outlook on the Web.

Screenshot showing what others see when using the scheduling assistant in Outlook Web Access and where a user has work location set
How work locations show up in the scheduling assistant in OWA


Pronouns in Microsoft 365

The new Pronouns feature has arrived for Teams and will be rolling out across contact cards in Microsoft 365 more widely in the coming months.

Using the Pronouns option allows you to easily add your preferred set of Pronouns, either from the suggested set, or by creating your own.

Adding Pronouns is easy to achieve by following these few steps …

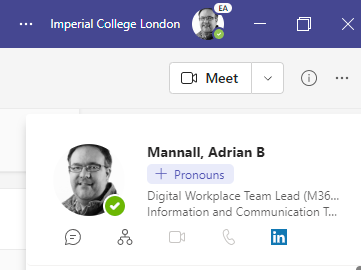
1. Click on your profile picture / initials in MS Teams

2. Click on your name to go into the profile “card” where more information about you is available.

3. Underneath your display name there is a “+Pronouns” button (or your chosen pronouns if you have already done this at least once.


Screenshot showing how to get to the pronouns feature on your M365 digital contact card
Where to find the pronouns feature


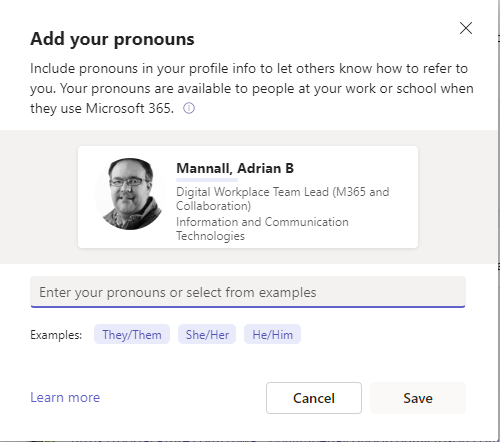
4. Click on the Pronouns button and choose the prnouns that you wish to add.


Screenshot showing how to set the pronouns of your choosing
Pronoun setting page


5. Click Save to complete the update of your Pronouns.