Microsoft Copilot with Commercial Data Protection (formerly Bing Chat Enterprise)
What is Microsoft Copilot with Commercial Data Protection (formerly Bing Chat Enterprise) ?
Microsoft Copilot with Commercial Data Protection (MS Copilot) uses the Chat GPT 4 AI model to interrogate and deliver search results based on access to the data that you have. Your data is protected and the chat results are NOT saved or made available for Microsoft, so the data does not pass outside of the organisation.
MS Copilot is grounded in data from the public web and provides complete, verifiable answers with citations, along with visual answers that include graphs and charts.
MS Copilot is designed by Microsoft in line with Microsoft’s AI Principles.
MS Copilot has no access to organizational data in the Microsoft 365 Graph.
How do I use MS Copilot?
Head to https://www.bing.com/chat and sign in with your College ID (username@ic.ac.uk). NOTE Only Staff with an A3 or A5 license for Microsoft 365 services can access Bing Chat Enterprise at the present time.
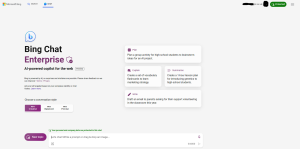
Once signed in you will see a “Protected” flag beside your name indicating that you are using the secure version of Microsoft Copilot with Commercial Data Protection.
The font page will appear with options to select a particular style of conversation (Creative, Balanced or Precise).
You can provide simple questions or more complicated multiple point paragraphs. MS Copilot will then interpret your request and deliver results which you can then refine as needed.
MS Copilot also incorporates DALL-E for image creation – this can take a little while to respond depending on how complicated your request is. You should also be careful to ensure that any image that you create correctly attributes any copyright for partial use from other published images. Failure to do so may result in image copyright infringement and subsequent demands for payments or charges being levied through legal action. If in doubt then adopt the premise of “don’t publish”!
Five Things to Try to Get Started
- Summarise a long document or article.
Navigate to a long article or document (PDF) on the internet, then use the Chat sidebar in Microsoft Edge to ask MS Copilot to summarise the document in 5 bullet points. - Draft emails and content that’s ready to send.
Navigate to your Outlook on the web (https://email.imperial.ac.uk) then use the Copilot icon in Microsoft Edge to ask MS Copilot to draft an email, e.g. “Draft an email alumni students asking them to consider leaving Imperial a gift in their will”. - Create an image.
In MS Copilot ask “Create an illustration of a shark jumping out of a coffee mug”.
Try changing the shark to a dolphin. - Learn new and useful information easily.
In MS Copilot ask “Explain how large language models work in simple terms”. - Get answers to complex and specific questions.
Try “Give me a table that compares Imperial’s undergraduate Medicine course to that of UCL”
More information
You can find out more about MS Copilot and how it works with your data and information by watching the Microsoft Mechanics video (https://aka.ms/BCE/MechanicsVideo)
There is also a recording of the Imperial Ask Me Anything session where we looked at BCE (now MS Copilot). This is available from our AMA Video library (The Microsoft 365 Ask Me Anything Pages – Home (sharepoint.com)). This information is only available to Internal users in Imperial College London.
This page was updated on 1 February 2024 to reflect naming changes in the Microsoft estate.