Blog posts

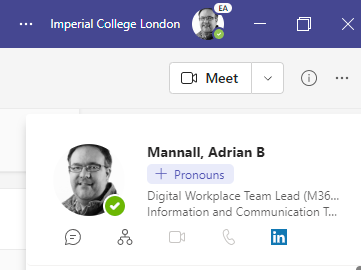
Do you know who are you sharing with? Profile pictures make life easier.

Office 365 is an amazing set of tools and it makes it very easy to share and collaborate on documents, BUT do you know with whom you are sharing a file?


We usually use a user’s email address or look them up in the address book by typing their name, but what happens when you have multiple people with similar names?


Here at Imperial we’d suggest that adding a photo to your profile will really help you and your colleagues to connect successfully.  Your profile photo is only visible within College, so external users won’t see your profile photo.  Having a profile photo on your account can really help avoid those “oops, I sent it to the wrong person” type errors.


How do I set or update a Profile Picture?

  1. Log in to https://office.imperial.ac.uk using your username and password and MFA if required.
  2. Click on the icon at the top right where your initials (or current picture are visible)

  3. Hover over the initials or icon and a camera image will appear – click on this to bring up a Change or Upload picture window (if you have pop ups turned off in your web browser then you will
    need to allow these before you can change your profile picture).

  4. Choose to upload a picture – select your profile picture using the file explorer window and click open to upload the picture.

  5. Use the zoom controls and the cursor to move the picture so that it is centred in the frame
  6. Click Apply – the new picture will be applied

  7. Click Done – and see your new profile picture against your account.


What “rules” apply to Profile Pictures?

Imperial ICT recommends that your profile picture should be a genuine likeness of you.

College has professional profile photo shoots held at different campuses throughout the year (see Staff photoshoot | Administration and support services | Imperial College London for details), or you could just ask a colleague to take a photo for you on your phone and then upload that.

Outlook and Teams Updates – November 2022

Following Microsoft Ignite (Microsoft’s annual technical conference), a number of updates for Outlook and Teams have been released.


During the Ask Me Anything (AMA) session held on 8 November 2022 many of these were covered with quick demos.

The session recording can now be viewed here (Imperial users only).


If you want to join future AMA sessions then please register to be added to the invitation by following the instructions in the blog post here.

Office 365 Training – 2022 / 23

Flipped open silhouette of a head with Office 365 app icons


We are delighted to announce the new 2022 / 23 training sessions bookable for the following Office 365 courses.


Getting Started with Office 365

This course covers the basics of Office 365 to help you get started and be confident using One Drive for Business, Office Online and to work with colleagues on shared documents.

Running at 10am on the following dates:

20 October 2022
08 December 2022
12 January 2023
07 March 2023
22 May 2023
03 July 2023

Click here to book.

Collaborating with Microsoft Teams and other O365 Services

Do you want to know how to do more with Microsoft Teams, collaborating with your colleagues, working in a single multifaceted workspace?  Come and find out how to do more with Microsoft Teams and other collaborative services.

Running at 2pm on the following dates:

20 October 2022
08 December 2022
12 January 2023
07 March 2023
22 May 2023
03 July 2023

Click here to book.

OneNote

Join the OneNote training to find out how you can replace the paper notebooks, search for content and use the “swiss army knife” app that is included in your Office 365 subscription.  In addition to looking at personal Notebooks, the course touches on the use of Class and Staff notebooks for teaching and management purposes.

Spaces are available at 10am on the following dates:

03 November 2022
15 December 2022
16 January 2023
09 March 2023
25 May 2023
04 July 2023

Book a place here.

Power Automate

This introductory course will help you get started with Power Automate – understanding the basics and how to build automation for personal productivity.  Automation can help with saving time and reducing errors by removing the human element from repetitive task processing.  Build it once, reuse the process time and time again in a repeatable method.

Sessions are running at 2pm on the following dates:

03 November 2022
15 December 2022
16 January 2023
09 March 2023
25 May 2023
04 July 2023

Book a place here.

An Introduction to SharePoint

We are developing a new SharePoint course and will announce further details once this is available.

Webinars

Available on demand most Tuesdays from 2.45pm.

Learn about the new Webinar feature in Teams and attend the training so that you can then request the Webinar feature for your account.

Book a session here.

Office 365 Ask Me Anything (Well Almost) – 2022 / 23

What?

We’re pleased to announce our new season of Office 365 Ask Me Anything sessions for the Academic Year 2022 / 23.

When?

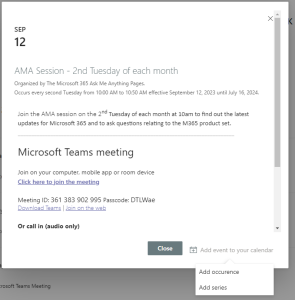
These will start on Tuesday 13 September 2022 at 10am and then be held on 2nd Tuesday of the month at 10am and on the 4th Tuesday of the month at 9am.

We’re varying the times a little as we know it’s not always convenient to make a 9am or a 10am slot.

We also know there are some clashes so we’ll try to move things for obvious clashes of date.

Where?

Online using Microsoft Teams

Who?

These sessions are open to all staff to join, listen, watch and ask questions about components of Office 365.

More Info

Whether you want to know about Teams Meetings or Webinars, new functionality being introduced or how to do something clever in Power Automate come along and find out more.

Some sessions will have a particular focus while others will be completely open.

How?

Sign up by completing the online form.  We’ll then add you to the sessions.


Creating Accessible Content using Office 365 Tools

We all create content that is viewed and used by others.  Do we actually think about our reader(s) and their needs?


Over 70% of all disabilities are invisible.  That means that many reader(s) would benefit from some form of accessible content.


I found this blog post which outlines 10 habits that we can all adopt to deliver more accessible content for our reader(s).


View the blog at 10 Habits to create accessible content – Microsoft Accessibility Blog

Screen capture in Windows and Mac OS

There are lots of reasons why you might want to grab a clipping of the whole or part of your screen.  Whether you are writing instructions for a handbook or a procedure, or just trying to capture an error message to pass on to your local support person.


Both Windows and Mac operating systems have built in screen clipping functionality.


Windows

To invoke screen clipping on a Windows 10 or 11 system press the Windows, Shift and S keys at the same time.  You will be presented with a floating bar which allows you to choose to clip the whole screen, or you can click and hold the left mouse button while selectig the area to “clip”.


Once clipped you can choose to open the clipping in an editor where you can add ink and highlighter marks, and you can save your clipping as a picture file for later use.  You can also copy your edited clip including inking and paste that into a document or email.


Find out more about Windows screen clipping on Microsoft’s support pages.


Mac OS

You can grab the whole screen by using the Command, Shift and 3 keys at the same time.


If you just want to select part of a screen then press Command, Shift and 4 at the same time, then use the mouse cursor to select the area that you wish to clip.


Find out more about Screen clipping for Mac OS at Apple’s support pages.

Really Simple Syndication (RSS)

What is RSS

Really Simple Syndication (RSS) provides a quick way to read the latest updates from your favorite websites.

Many websites offer direct RSS feeds. When a new article is published the RSS feed updates and you can be notified to the new article(s)

If you want to get into more of the nitty gritty and techie know how about RSS then there are some good articles published on WIkipedia (https://en.wikipedia.org/wiki/RSS) and Lifewire (https://www.lifewire.com/what-is-an-rss-feed-4684568)


Why use RSS

RSS is effectively a way to keep tabs on a website or blog page and check for new content without having to continuously visit the page to check for new content. Your RSS feed becomes the “push notification” for new content.


What is the RSS for this blog?

The RSS feed for this blog is http://feeds.feedburner.com/Office365NewsAndUpdates


How can I “consume” RSS feeds?

There are a number of ways to consume the content or get updates about new content on the blog.

You can use the Outlook desktop client to read RSS feeds, or you can deliver the RSS feed into the posts tab of a teams channel, or you can use your own preferred RSS reader.


Outlook to read RSS feeds

You can configure Outlook to digest RSS feeds and deliver the summary and link to your Outlook client.
See https://support.microsoft.com/en-us/office/subscribe-to-an-rss-feed-73c6e717-7815-4594-98e5-81fa369e951c


Using Teams to consume RSS feeds as posts in a Channel

        1. Select the channel where you want the RSS feed to post – you might want a seperate channel for each feed depending on the number and fequency of updates.
        2. Click on the three dots and choose ConnectorsScreenshot showing how to get to connections in Teams
        3. Choose the RSS connector and click “Add”Screenshot showing how to add RSS as a connector   Screenshot showing adding RSS as a connector
        4. Then click on three dots beside channel name and choose connector and then configure the RSS feed – give the connector a name (such as Imperisl Office 365 Blog) and enter the rss feed as above (http://feeds.feedburner.com/Office365NewsAndUpdates) and choose the frequency of updates.SCreenshot showing how to get into RSS connector configurationScreenshot showing the details for configuring the Office 365 blog RSS feed
        5. For this blog you’ll probably only want to check once a day.
        6. Click save
        7. The RSS feed set up will be shown in the posts tab of your channel along with a post from the RSS connector with recent posts.Screenshot showing what the RSS posts look like in Teams

Using a different RSS feed reader

There are numerous RSS readers available. You can find out about the top ten RSS readers here.  The page gives details on pricing and which operating systems / use modes are supported.

Set up your RSS reader according to the general instructions for your software of choice, then add the feed using the dedicated feed for this blog (http://feeds.feedburner.com/Office365NewsAndUpdates)


Teams Meeting Co-Organisers

Scheduling meetings for others? Want to give someone else control of the meeting?


Set up Co-Organisers to control the meeting and lobby even if you can’t attend.


How?

  1. Schedule your meeting as normal.  Ensure that you have invited at least your proposed co-organiser (must be inside the organisation) and any presenters.
  2. Go to Meeting Options
  3. Look for the co-organiser setting and click on the drop down arrow to select the co-organiser.

    Screenshot of meeting options for selecting co-organiser

  4. Save your meeting options.


When will this be available?

Microsoft have started to roll this out and expect it to be fully available by the end of March 2022.

Group your Microsoft Forms

Lots of Microsoft Forms?  Struggling to find the right one(s)?


You can now group your forms into Collections to make it easy to find forms or keep similar forms together.


How do I do that?

  1. Go to forms in Office 365 (https://forms.microsoft.com).
  2. Scroll down and click on the All forms link to the bottom right of the screen …
  3. In the top right click on the “New Collection” link …Screenshot showing the "new collection" link in Forms.
  4. Name your collection
  5. To assign a form to a collection click on the three dots on the form and choose “move to collection” and then the collection that you wish to usescreenshot showing move to collection in Microsoft Forms
  6. Once you have added forms to a collection you will see your collection in the forms pages and can drill into a collection to use the forms like normal.  You can also create new forms in a collection directly.Screenshot of a forms collection